The Cooking Project Celebrate wholesome, delicious, and beautiful food found everywhere around the world.

July 11, 2011

10 Best Things I’ve Grilled

Filed under: Uncategorized — cookpro @ 5:39 am

by Anna Reeser

Hey, I think it’s time to get this blog started again.

Lists are always a good way to start things, so here’s a list of 10 foods that I have not regretted putting on a grill. In fact, these have all been transformed by the barbecue and now I don’t want to cook them any other way.

1. Chicken thighs with Indian spice marinade (paprika, cumin, salt, pepper, lemon, pinch of cayenne, crushed garlic).
2. Husked corn.
3. Shrimp on skewers in simple marinade (soy sauce, garlic, ginger, sesame oil & lemon).
4. Tri-tip soaked in SoyVay marinade.
5. Avocado, sliced in half and pitted.
6. Lamb sausages. Find them.
7. Kale in coconut marinade (coconut milk, lemon, salt, paprika & cayenne).
8. Nectarine, sliced in half and pitted.
9. Summer squash, sliced in strips.
10. Fingerling potatoes, diced, coated with dijon mustard, olive oil and salt, then steamed on the grill in foil packets.

July 26, 2010

Avocado Ideas

Filed under: Uncategorized — cookpro @ 10:14 pm

by Anna Reeser

I recently received a request for a post about avocados, so here it is. I love avocados deeply, and buy them as part of my weekly sandwich ingredients regimen. But apart from squishing avocado on bread to make lunch more succulent, I’ve discovered many interesting ways to use this buttery  fruit. Here are a few, and feel free to send in your own ideas!

1. Grilled Guacamole

I got the idea from Mark Bittman: http://www.nytimes.com/2010/06/30/dining/30mini.html?scp=2&sq=grilling&st=cse. Normal guacamole is amazing as is, but it becomes ten times better when the ingredients are separately grilled. I made this on the 4th of July. A few days later, I was at a party down the street and when I introduced myself to someone they said “Oh, you’re the one who made grilled guacamole at the barbecue?” Yes. I guess word had spread. Anyway, it’s definitely worth trying. When the grill is hot, place rounds of sliced red onion on the grill. Cut your avocados in half and remove the pits. Gently rest them meat-side down on the grill and cover for 1-2 minutes. Carefully lift them with tongs. You should see slight grill marks and the meat will turn bright green. Scoop the hot, smoky avo into a bowl. Remove onions from grill when they are beginning to crisp. Chop onions, some fresh cilantro, and garlic. Stir into bowl. Add a few spoonfuls of your choice of salsa. Salt and pepper to taste, then serve immediately with chips. It will be gone in minutes.

2. Completo Italiano

When I visited CJ in Chile last summer, I learned about the Completo Italiano. Chileans are generally fans of avocado (palta), so it appears on most food including hot dogs. The Completo Italiano gets its name because the stripes of mashed green palta, red ketchup, and white mayonaise that cover the hot dog represent the colors of the Italian flag. The condiments are then topped with a liberal shake of salt. This was definitely a highlight of the Chilean street food scene, and a simple recipe that can be appropriated at home.

3. The Salad that Never Fails

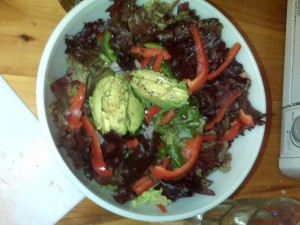
This salad uses avocado as just one of its many ingredients, but it becomes essential in creating the creamy taste. This salad recipe is a variation of the salad my parents usually make. It’s really simple. For the veggies, use washed, torn red leaf lettuce. Slice some small tomatoes, red bell pepper, and cucumber. Add sliced avocado (I like to halve and pit them, make lengthwise slices in the meat with a knife, then scoop them out with a spoon). For the dressing, combine equal parts olive oil and rice vinegar with a splash of balsamic vinegar. Add a mashed clove of garlic, a splash of worchestershire sauce, a large pinch of grated parmesan cheese, a large pinch of dill (fresh or dried), then salt and pepper to taste. Lemon and fresh basil are good additions too. Mix by shaking in a jar with a lid.  Keep tasting and adjusting till it’s salty, tart and flavorful. Toss the salad with dressing, some toasted walnuts, and dried cranberries. Sprinkle with grated parmesan, and serve.

July 14, 2010

Okra

Filed under: Uncategorized — cookpro @ 10:35 pm

by Anna Reeser

Ever since I was old enough to want unconventional things to say, I’ve been claiming okra as my favorite vegetable. I have also been citing my octopus bite as my most interesting scar story since the day it happened when I was ten. (Ask me about that sometime). Just like the octopus bite, which always brings in a string of questions, people are usually curious about what okra is and why I would prefer it to obvious green edibles like green beans and zucchini and asparagus.

Essentially okra looks like a little pointed seed pod with a cap. It has a peach-like fur on the outside and nutty seeds and an odd slime on the inside. The plant originates in Africa, and comes from the mallow family along with species like cotton and cocoa (http://en.wikipedia.org/wiki/Okra). Okra appears in Southern cuisine and Indian dishes, neither of which are part of my heritage. Yet, okra has always been a comfort food for me.
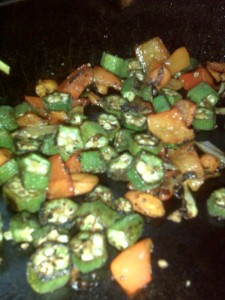
My dad has prepared stir-fried okra on occasion since I can remember. Often the bizarre pods came straight from our backyard garden. The flavor of cooked okra is difficult to describe. It is the taste of nuts and cast iron and green. And, oddly enough, the taste of home. I asked my dad (Dave Reeser, who designed and started this website) how he was introduced to okra. He told me, “I always loved Gumbo and wanted to make some but had a difficult time finding okra in the supermarkets. So we planted some one summer. It grew fast in the San Fernando Valley and soon there were many pods, but some had already become tough. The Gumbos were okay, but it was hot and we didn’t want soup that often. So, we looked for other recipes. About that time we got Madhur Jaffrey’s Indian cookbook with the okra on the cover and tried some of the dishes. The mushy ones didn’t appeal at the time but the sliced and fried hot one did. So, I perfected my version:

Ingredients:
1 huge pile of sliced fresh tender okra
4 or 5 diced up small Japanese Peppers (they are hot and similar to a Serrano)
a  bunch of sliced scallions
some cut up Pole beans (green beans) about 1/4 the amount of the Okra

Method:
Fry the okra first for a while in the hot oil till almost brown add the other ingredients and brown, then add black pepper and salt.”

To fill in the story, my parents moved from LA to Ojai just before I was born, and were able to grow more okra in the warm climate there. My dad must have altered his original okra recipe over the years, making it milder to appeal to us children. One of my favorite recent okra stir-fries involved sweet red bell peppers and mustard seeds. When I moved to Berkeley, I was comforted to see okra in the daily spread of weird vegetables at the Berkeley Bowl market. I began making okra, urging my skeptical housemates to try the little cross sections of seed pod crisped in olive oil. Here is a recipe for the simple okra stir-fry I made this week. Now I’m excited to try my dad’s recipe with hot peppers and green beans.

Ingredients:
1 lb sliced fresh tender okra
1 red bell pepper
1/4 sliced sweet onion
1 tablespoon mustard seeds
a few sliced small carrots
salt & black pepper
hot pepper flakes
olive oil

Method:
Heat oil in a cast-iron pan until mustard seeds sizzle when dropped in. Add okra and onions. Cook until okra slime begins to cook off, then add peppers and carrot slices. Fry until well browned. then add black pepper, hot pepper flakes and salt.

Yield: depends on how much okra you can eat in one sitting. In my case, quite a bit.
July 13, 2010

Cucumber Yogurt Salad with Avo Toast

Filed under: Uncategorized — cookpro @ 12:24 am

by Anna Reeser

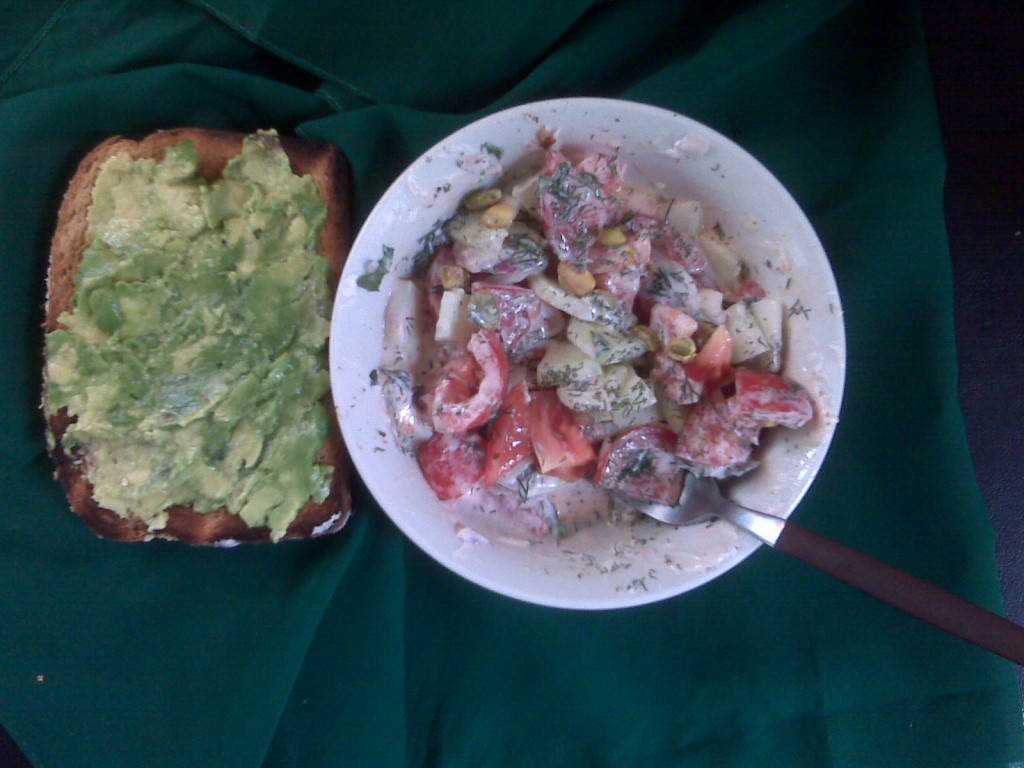
Lately I’ve been on a roll of making small, strange meals. I’ve also set out to prove that dill makes salads taste wonderful and distinctly like summer. I making this bizarre little lunch, I wanted something cold and crunchy to eat while sitting on the backyard couch in a patch of sun. I also wanted to use up a cucumber, a small tomato, half an avocado, and the rest of my greek yogurt, and highlight the dill and mint that are growing in the garden. And this is what happened:

Ingredients:

1/3 medium cucumber
1 small tomato, or a handful of cherry tomatoes
3 tablespoons plain greek yogurt
fresh & dried dill
fresh chopped mint
rice vinegar
olive oil
honey
salt & pepper
pistachios (almonds would work too)
1 slice whole wheat bread
1/2 avocado

Method:

1.    Slice the cucumber into small triangles. Slice tomato into small pieces (or cut cherry tomatoes in half)
2.    Mix thick greek yogurt with a drizzle of olive oil, splash of rice vinegar, and drizzle of honey until the consistency becomes thin enough to easily coat the cucumber and tomato pieces. Add salt, pepper, dill and mint.
3.    Add cucumber and tomato to the mixture, mix. Garnish with shelled pistacio nuts.
4.     Toast bread. When it turns golden, top with mashed avocado and a pinch of salt.

Yield: lunch for one

July 12, 2010

Fry Pan Challenge II

Filed under: Uncategorized — cookpro @ 4:48 pm

What’s your best one-pan meal? Send in recipes (using the Send a Recipe page) for an entire meal (breakfast, lunch or dinner) that is prepared in a single pan. We’ll follow all the recipes and choose a winner from the submissions we receive by August 1. The winner will be posted on the Fry Pan Challenge page.

Criteria:

– Originality

– Deliciousness

– Accessibility (meal should be fairly simple to make)

June 14, 2010

Homemade Rustica Bread

Filed under: Uncategorized — Editor @ 6:09 pm

by Rachel Wexler

First, make the more complex ingredient, the poolish, ahead of time:

Poolish

Ingredients:

1 cup minus 2 tablespoons room-temperature water

3/4 teaspoon crumbled cake yeast (or red star dry yeast works just as well)

2 cups organic white flour with retained germ (I used white flour)

Method:

In a 1-gallon plastic container, combine the water and yeast and stir until the mixture is milky and foamy and the yeast is fairly dissolved. Stir in the flour until just combined. Cover and leave at room temperature for 5 hours. May be refrigerated for up to 48 hours before using. Bring to room temperature before using.

Yield: About 1 1/2 cups.

Rustica Bread

Ingredients:

1 cup plus 6 tablespoons water just slightly warmer than room temperature

3/4 cup poolish

3/4 teaspoon cake yeast (or normal dry yeast!)

3 cups minus 2 tablespoons unbleached all-purpose flour

2 tablespoons raw wheat germ

1 teaspoon fine sea salt

Method:

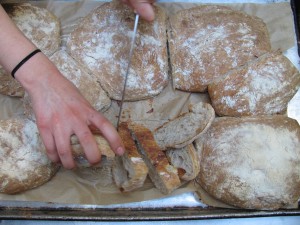
1. Place the water in a large mixing bowl. Break the poolish into small pieces with your hands or a wooden spoon and add it to the bowl along with the yeast. Stir until fairly dissolved. Stir in the flour, wheat germ and salt and stir until combined. Continue stirring for 5 minutes. Cover the bowl and let sit for 20 minutes.

2. Turn the dough out onto a lightly floured surface. Gently fold the dough in half lengthwise and then fold it in half again crosswise. Return the dough to the bowl with its smooth side up. Repeat the folding process 2 more times over the next 40 minutes. After the last turning, let the dough rest for 20 to 30 more minutes.

3. Gently turn the dough out onto a lightly floured surface. Loosely form it into a square on the table, taking care not to deflate it. Using a knife or bench scraper, cut the dough into 4 equal squares. Gently move the pieces to a sheet pan lined with a well-floured heavy tea towel, and cover loosely with plastic wrap. (Or just put it on the pan you will bake it on and leave it covered to rise) Let rest until the dough just holds the imprint of your finger when you press it gently, 1 to 1 1/2 hours.

4. Preheat oven to 450 degrees and have a plant sprayer full of fresh water ready. Very gently transfer the dough pieces to 2 sheet pans lined with parchment paper, putting the side of the dough that came in contact with the floured tea towel up and leaving plenty of space between the pieces. (Omit this step if baking on the sheet they rose on) When the oven is hot, spray it thoroughly with water and immediately put the bread in and close the door. Spray the oven (not the bread) again 3 more times during the first 5 minutes of baking. (Or preheat the oven with a pan in the bottom and fill the pan with ice when you put the loaves in). Bake until the bread is golden brown and sounds hollow in the center when tapped, 15 to 20 minutes more.

5. Remove the loaves from the oven and cool them on a wire rack.

Yield: 4 small loaves.

June 10, 2010

Roasted Potatoes with Green Beans, Sausage and Poached Egg

Filed under: Uncategorized — Editor @ 9:39 pm

by Anna Reeser

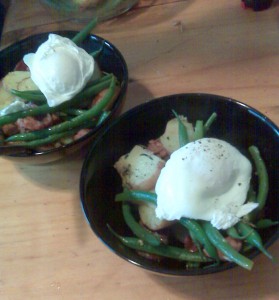
The question of “what to do with the potatoes” has lingered for weeks. For some reason, CJ finds himself buying bags of potatoes and letting them sit unused until they sprout. He planted the really far-gone ones in the garden, but I found a bag of red creamers that was still edible. Inspired by Martha Rose Schulman’s recent potato and green bean recipe on the NY Times, I decided to pair the potatoes with blue lake green beans. Her recipe had slices of hard-boiled egg, but I thought the potatoes might benefit more from some sausage flavor. I asked CJ whether we should use the sausage or the eggs, to which he replied, “well those things aren’t mutually exclusive.” But of course. Anything can be topped with an egg and always seems to improve. But runny yolk is essential for topping food with eggs. CJ decided to try poaching them to preserve the freshness of a hard boiled egg but still get the dramatic stream of yolk. Egg poaching seemed like a daunting task. I tried it last year, and ended up with a weird foamy cloud of egg white. But CJ has mastered the over-medium egg and even omelette flipping, so poaching came naturally as well. The bright white eggs were perfect: they sat atop the salty, starchy, tangy mixture of potatoes, green beans, sausage, lemon, balsamic vinegar and fresh herbs from the backyard. When sliced, the yolk ran down and coated the whole dish. Leftovers also provided a perfect breakfast (topped with a fresh poached egg, naturally).

Ingredients

6-8 red creamer potatoes
1 lb blue lake green beans
2 sausages (pre-cooked, of your choice. I think we used Louisiana Hots)
2 eggs, poached
rosemary
oregano
thyme
salt
pepper
olive oil

Method

1. Preheat oven to 400 degrees. Wash potatoes and slice them into 1/2 inch thick semi-circles. Toss on baking sheet with olive oil, salt, pepper, rosemary, oregano, and thyme and put in the oven when it’s ready.
2. Remove stems from green beans and place in a steamer basket in a large pot with a few inches of water over medium heat. Steam beans until tender but still bright green.
3. After about 10 mins, check on the potatoes. If they’re starting to soften, add chopped pre-cooked sausage. Cook until potatoes are browned and slightly crispy.
4. Poaching is really simple. Heat water in a small pot until it’s barely boiling: just tiny bubbles, not a full rolling boil. Crack the egg into a small bowl first (this helps preserve the shape) then pour into the water. Nudge with a slotted spoon to keep the whites together. Let it cook for 3 minutes, then carefully scoop onto a paper towel with the slotted spoon. We made the eggs one at a time to make sure they didn’t coagulate while cooking.
5. Toss the finished potato & sausage mixture into a large bowl with the green beans. Add lemon and balsamic vinegar, then serve. Top each portion with a poached egg and garnish with ground pepper.

Yield: 2-3 servings.


May 27, 2010

Artichoke and Arugula Pizza with Prosciutto

Filed under: Uncategorized — Editor @ 5:28 pm
by Elizabeth Woolf-Willis

I make this pizza all the time, always with my mom. It doesn’t take that long to actually make, you just have to have all the ingredients, that’s the hard part. And the flavors might seem weird at first, but they totally work well together. We changed the recipe around a little; we buy the pre-made whole wheat pizza dough from Traders Joe’s. Also, the last time we made it, we just put all the ingredients on and baked it the whole time straight because we forgot which ingredients went on first and realized we had just put them all on, so we just went with it. But never the arugula, that always goes on after you’ve cut it and cooked it. This is such a good recipe; its pretty salty, and can also get gooey with all the cheese and lemon juice and oil from the pesto, so just make sure the crust is done all the way.

Here is the original recipe from Cooking Light, Jan. 2007:

Artichoke and Arugula Pizza with Prosciutto

Yield: 4 servings (serving size: 2 wedges)

Ingredients

  • Cooking spray
  • 1  tablespoon  cornmeal
  • 1  (13.8-ounce) can refrigerated pizza crust dough
  • 2  tablespoons  commercial pesto
  • 3/4  cup  (3 ounces) shredded part-skim mozzarella cheese
  • 1  (9-ounce) package frozen artichoke hearts, thawed and drained
  • 1  ounce  thinly sliced prosciutto
  • 2  tablespoons  shredded Parmesan cheese
  • 1 1/2  cups  arugula leaves
  • 1 1/2  tablespoons  fresh lemon juice

Preparation

Position oven rack to lowest setting. Preheat oven to 500°

Coat a baking sheet with cooking spray; sprinkle with cornmeal. Unroll dough onto prepared baking sheet, and pat into a 14 x 10-inch rectangle. Spread the pesto evenly over dough, leaving a 1/2-inch border. Sprinkle mozzarella cheese over pesto. Place baking sheet on the bottom oven rack; bake at 500° for 5 minutes. Remove pizza from oven.

Coarsely chop artichokes. Arrange artichokes on pizza; top with sliced prosciutto. Sprinkle with Parmesan. Return pizza to the bottom oven rack; bake an additional 6 minutes or until crust is browned.

Place arugula in a bowl. Drizzle juice over arugula; toss gently. Top the pizza with arugula mixture. Cut the pizza into 4 (7 x 5-inch) rectangles; cut each rectangle diagonally into 2 wedges.

– Kate Washington, Cooking Light, JANUARY 2007

May 19, 2010

Kung-pao-esque Stir Fry

Filed under: Uncategorized — Editor @ 9:33 pm

by Anna Reeser

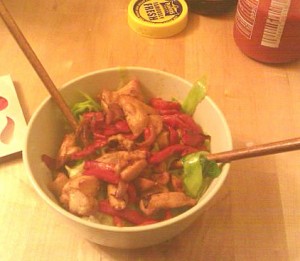
To start this project off, here’s a recipe that is fully in the spirit of quick, random, delicious original meals. On Monday night, struck by after-work hunger of a serious kind, I appear at CJ’s doorstep. He claimed to have “enough food, a cabbage at least.” Yes. As long as there’s cabbage, with which anything can be accomplished. The candidates were lined up on the counter: half a green cabbage, a red onion, a red anaheim pepper, chinese broccoli, some frozen chicken thighs, a jar of white rice, peanuts, garlic and a lemon. Rice went in the rice cooker. I began chopping vegetables feverishly and with no real plan. “So we’re just frying all this stuff up?” CJ asked. We did exactly that, and what emerged was flavorful, slightly spicy, tinged with hot pepper and peanut: the best impromptu kung-pao-esque chicken stir fry I’ve ever had.

Ingredients:

1 cup jasmine rice
1/3 head of green cabbage
2 small heads of chinese broccoli greens (miniature bok choy works too)
1 red anaheim pepper
1/2 red onion
3 cloves garlic
1 (or 2) boneless skinless chicken thighs
1/2 lemon
soy sauce
salt & black pepper
peanut oil
olive oil
peanuts
hot sauce (Sriracha is recommended)

1. Start the rice in a rice cooker or on the stove.
2. Chop the cabbage and greens into strips. Chop onion into small pieces. Seed the anaheim pepper and cut into thin strips. Mince garlic. Defrost chicken (if necessary) and cut into small chunks.
3. Add peanut oil to a cast-iron pan. When hot, add chicken with a generous amount of soy sauce and half a lemon’s worth of juice. When chicken starts to brown, add peppers and onions. Stir and fry, add black pepper.
4. In a separate pan, heat olive oil. Add cabbage, greens and garlic and a little water. Put a lid on the pan to steam till the greens are soft, then remove the lid so that water cooks off. Add salt and black pepper.
5. When everything is done, serve with rice on the bottom then a layer of cabbage/greens, then a layer of chicken/onions/peppers. Garnish with peanuts. Eat with chopsticks. Adjust spiciness with Sriracha, if desired.

Yield: 2 large servings.

May 13, 2010

The Beginning

Filed under: Uncategorized — cookpro @ 10:42 pm

Hello and welcome to The Cooking Project. This summer, this site will start fresh with a slightly new mission statement. I want to turn The Cooking Project Magazine into a blog for people who find themselves cooking to share the interesting recipes they’ve invented. I just started cooking a little over a year ago, and it has grown into a complete obsession that I’m able to practice and improve everyday because, no matter what, I have to eat. I’ll begin this blog by posting one of my simple recipes that grew out of pure trial and error, and I hope to read about similar recipes from all of you.

So, how it’s going to work: send your recipes to me using the “Send a Recipe” page. Include accompanying stories for context and pictures of the food. Also, articles about food from international travels, or restaurant reviews would be fun. I’ll format them and post them to the site. Soon, we will have an archive of original cooking ideas.

Sincerely,
Anna Reeser

Powered by WordPress